amber black

  • home
  • topics
    • life & living
    • food & drink
    • community & humanity
    • hacks & productivity
    • books & learning
    • places & travel
    • bits from our life
  • about
  • contact

How to Make “Real” Popcorn (no special equipment required)

November 2, 2012

Last week I shared how easy it is to make oatmeal without the little packets. And I shared how confused I am that foods like oatmeal have an “instant” version. Popcorn is another one of those things.

I mean, fair enough, if you microwave popcorn from a bag, you don’t have to clean a pot. But you also have to eat powdered butter, spend extra money, and throw a few extra things in the trash. Which I did for years because the only non-microwaved popcorn I’d ever had required a special machine.

Who knew you could make it in a normal pot? Well, the Aztecs did, I guess. But the tradition died and we started eating sub-crunchy semi-burned popcorn with flavor granules on top, and now people like me grow up not knowing that you can put just any ol’ pot on the stove with oil and kernals and make the tastiest popcorn ever in huge quantities.

But now, I know. And you do, too!

How To Make “Real” Popcorn on the Stove

Gather Your Stuff:

  • Oil
  • Popcorn Kernels
  • a Pot with a fitted lid

I mean, that’s stupid easy right?

A real quick note about that pot: You want it to be deep like a sauce pan or a soup pot, not wide like a skillet. It can be small or big, but as I’m not going to give you exact ingredient measurements (gasp!) you want to select a pot that doesn’t put you in danger of the kernels popping over. (In case someone out there really needs a guideline, I’ve done a little geeking out for you and figured out that if your pot has 2 inches of height for every 3 inches of diameter (ish), you’ll most likely be fine.)

Back on track.

Those three things above are really all you need, but do yourself the favor of getting out some butter and salt, too. Pretty please do that for me?

  1. Put the pot over medium heat and add enough oil to thinly coat the bottom (and swirl it to coat). Put one kernel in the pot and put the lid on. But leave it slightly askew so the steam can escape.
  2. When the kernel pops, add the rest of the kernels. You can measure them if you want to, but if you’ve chosen a pot like I described above, you can just cover the bottom of the pan about a layer and a half thick with kernels. (If the popcorn “overpops” the pot, use less next time; if it doesn’t max out the pot, next time you can add more. No need to overcomplicate it.)
  3. Let the kernels pop, shaking the pot every two minutes or so to help the unpopped kernels settle to the bottom. (That way you have fewer unpopped kernels in the end.) I just grab some potholders, let the lid close over the pot, and hold the lid down as a lift the pot by the handles and give it a big every-which-way shake. That’s usually my exercise for the day. (Don’t forget to re-vent the lid.)
  4. When the popping slows, take the pot off the heat, leaving the lid on until the kernels stop popping. If you ignore this little gem and lose an eye, I will show your lawyers that I clearly warned you.
  5. Flavor the popcorn, and eat voraciously!

Flavoring the Popcorn

Popcorn flavors are limited only to your imagination. But here are a few ideas to get you started:

Butter & Salt

Melt some butter in the microwave (I suggest adding a little extra salt to the butter, even if it’s already salted. It will make the butter taste extra buttery.) Drizzle the melted butter on the popcorn, stirring lightly as you go. Then sprinkle with kosher salt and stir.

Salt & Pepper

Do the same as above but add ground black pepper when you add the salt. If you don’t taste the pepper, keep adding more until you do. Just trust me on this one.

Spicy Chili

Do the same butter-melting-thing described above and then sprinkle on a mix of hot chili spices and salt. We use this recipe from Martha, but for the life of me I can’t figure out why she uses olive oil. Use butter, friends. Butter. (The recipe is the last one on that page.)

Special Concoctions

There are a bazillion flavor-ideas for popcorn on the internet: Martha has pages worth of ideas. Pinterest has a few things (of course), and tastespotting will tempt you silly.

Our most recent love is Autumn-Spiced Popcorn. It’s buttery and sugary and all-things Autumn. I highly recommend it.

…what about you?…

Are you a popcorn person? What is your favorite way to flavor it?
9 Comments

Autumn-Spiced Popcorn

November 1, 2012

This is one of our favorite fall snacks. Hope you enjoy it!

Autumn-Spiced Popcorn

recipe adapted from Perry’s Plate

6 (ish) cups popped popcorn (use more or less as desired)
2 Tablespoons butter, melted (make sure it’s salted! or even extra-salted. yum.)
2 Tablespoons brown sugar
1 tsp. pumpkin pie spice
More salt

Melt the butter, brown sugar, and pumpkin pie spice in the microwave. You can do this just until melted, but I’ve found that if I do a few more 20 second bursts and stir in between, the sugar melts better.

Drizzle the butter mixture over the popcorn a little at a time, stirring gently as you go.

Let the popcorn sit for a bit (maybe 10-20 minutes?) to let the sugared butter cool. (Otherwise it will be really tacky on your fingers. After it cools it’s less tacky and the popcorn seems crunchier.)

Eat up.

Leave a Comment

How To Make Oatmeal (The quick, easy, healthy, earth-friendly alternative to “instant”)

October 26, 2012

We’ve been duped, friends. In the convenience food craze of the last few decades, companies began selling as “instant” foods that were already quick and easy to begin with.

Fast-forward enough years and we’ve nearly forgotten that these instant food even had original versions. Oatmeal is a great example of this. Oatmeal, as in the hot breakfast dish, used to be something other than what comes out of a paper pouch. Something almost as quick, but healthier, tastier, and better for the environment.

Why Oatmeal?

Oatmeal is an easy and satisfying breakfast. Oats have a good amount of protein, so they leave you feeling satisfied longer than other breakfast carbs like toast or muffins. Oatmeal is also an easy base for supplemental fruit, fiber, or extra protein.

It’s also fast. You can microwave it in under 5 minutes. A full batch on the stove top with fresh fruit and all will take about 15-20 minutes. And it reheats incredibly well. So you can make a big batch over the weekend and microwave smaller servings daily throughout the week. Way easy.

So.

Today’s post is all about making oatmeal. No recipes, just ideas and a simple ratio. By the end you should be able to make your own oatmeal in under five minutes (which is still pretty instant in my book), but without the curious ingredients and extra cost. [Read more…]

7 Comments

My Top 5 Resources for Recipes and Food Ideas

October 12, 2012

Our gas cylinder (the source of gas for our stove/oven) was stolen a few nights ago, which means I’m suddenly switching gears from the food post I had planned this week. Add that to an October full of surprises, guests, and big life moments (like possibly getting a new job and/or buying a house), and you get…

Well, I don’t know what you get. Whatever it is, I think it falls under the rhyme my friends use with their kiddos: “You get what you get and you don’t throw a fit.”

Well, it rhymes in the southern states, at least. Don’t be a hater.

I’m reminding myself not to throw fits about the curve-balls that come my way and just ride it out. Today that means I’m accepting the freedom to share a post I posted a while back on a personal blog. It fits our theme, and relieves me of the pressure of figuring out what to do in the (surprise!) absence of my stove and oven. (It also relieves you of reading something unfortunately crappy.) See? We all win.

You may have guessed by now that I love chasing the home-chef dream. I love to learn the best way to do something and why it’s the best way and when it’s the best way and when it’s not. I love discovering ingredients and learning how to improve something I’ve been doing “wrong” for a long time and enjoy all colors of kitchen geekery. I do like to cook, but it’s more about the aesthetic, the process, and ultimately, putting something really delicious on the table. Which means, ironically, I don’t cook as often as you might think.

As a way to discover food and flavors, I often use recipes as a first foray into uncharted territory. But in the years since I began learning about food, I’ve discovered that not all recipe sources are created equal. There are a few gems out there, but I’ve sworn off far more sources than I’ve returned to.

Several years ago I pinned down what it is I want out of a recipe (and a recipe source). Settling this in my mind has helped me find better recipes in less time. If you haven’t already, I highly suggest collecting your own (limited) set of resources that fits your food personality and personal taste. Today I’m sharing my list with you. I think more than 80% of my recipes come from the following sources. Here are my loves with a short explanation of why they make the Top 5.

1) Everyday Food

Everyday Food is my go-to resource for solid, standard recipes. The vast majority of their recipes use standard ingredients and simple techniques to yield great results. I get lots of simple ideas for, well, everyday food.

I used to primarily use the magazine (may she rest in peace), because the page-flip browsing was great for getting ideas-a-plenty in any season. But now I use the website to search for recipes for particular ingredients; for a not-too-much-fuss tart perhaps, or simple ways to prepare fish.

2) Fine Cooking

As I’ve said, I am wary of recipes. I use them, of course, but I generally don’t trust them. Fine Cooking is an exception to this. Nearly everything I’ve made from them has been tasty by my own estimation (I tend to be my toughest critic) and enjoyed by everyone else. I also learn a lot of techniques from Fine Cooking as they aim to educate as well as provide recipes.

I use the magazine and magazine archive versions of Fine Cooking. I don’t go to their website much as they charge a subscription fee to access a good portion of their site, and I feel like I have what I want from print and digital sources.

3) Cook’s Illustrated

When I first published this post, the Cook’s Illustrated homepage read, “You don’t need 100 recipes for Roast Chicken (or anything else), you just need one that works.” This is pretty much Cook’s Illustrated in a nutshell.

I love Cook’s Illustrated because I learn a lot from their descriptions of the trial and error process they went through to get to that “one recipe”. They certainly take the descriptions too far sometimes, but I don’t really mind because by the end of a two-page article I’ve gained a great recipe as well as the understanding of what makes it great. For instance, in the Cook’s Illustrated recipe for Phad Thai they describe a no-fail way to prepare rice noodles. (If you’ve worked with rice noodles you know how temperamental they can be.) I have since used this technique on many sorts of rice noodles for a variety of dishes with 100% success. It’s back-pocket tricks like this that earn Cook’s Illustrated it’s spot on the list.

Like Fine Cooking, Cook’s Illustrated charges a subscription fee for accessing most of their online content. Bump that, I’ll take print. I most frequently use The New Best Recipe as a sort of encyclopedia for recipes, but also grab recipes from the magazine on occasion. Though I did just discover they recently released an iPad edition of the magazine, so this may all be changing for me in the near future.

4) Food Network

I go to Food Network for interesting and odd finds, twists on a classic, or creative combinations. I don’t go to Food Network for standard recipes. There are better sources for that. If I’m looking for a sampling of decent recipes for a specific dish, that’s when I use Food Network. Recently I perused them for Pulled Pork recipes and in a very short time I had a handful of promising options.

One reason Food Network is a great option for this sort of thing is because their recipes are comprised from those of individual chefs rather than from recipes conceived in a test kitchen. I feel like each recipe of a certain dish reflects its creator and is distinctive from the other offerings of the same item. With a test kitchen the recipes tend to be more middle-of-the-road and less interesting.

(An additional tip: When FN recipes were first presented on TV, they were often grouped with sides as part of an overall meal. If you follow the link to the original episode, you can get ideas for what else to serve alongside the recipe. Even if you don’t use that exact recipe you can still get good ideas for sides.)

I use the website 99% of the time, as I prefer other food magazines to Food Network’s offering.

5) TasteSpotting and Foodgawker

I have a hate/love relationship with food blogs. I hate them because the recipes are even less reliable than usual, and because after peaking my interest with a beautiful photo of the finished dish, the recipes never seem to deliver. I’ve had more disappointments with tries from food blogs than from any other source. And I hate, hate, HATE the long string of dish-preparation pictures. I’m sorry, but I’ve seen onions and peppers and garlic mellow in olive oil before. Many times. Please have mercy on my poor scrolling fingers.

Anyway.

What I love about food blogs is the new ideas for food combinations and plating, and how looking at them inspires me to get in the kitchen. It just so happens that Tastespotting and Foodgawker incorporate the best of these two things while bypassing what I dislike. Score.

Here’s how I use them: I’ll go to the site, type something in the search box, and then peruse related titles and photos. Recently I was looking for some ideas for empanada fillings. I typed “empanada” in the search box and soon I was browsing pictures of everything from Guava & Manchego Empanadas to Butternut Squash & Mushroom Empanadas. Yum.

A Notable Absence

You may have noticed that user-submitted recipe sites are absent from the list. This is not because I never use them, but because they require heaps of extra time and effort. I have to sort through a lot of obviously misinformed recipes (like the one for jambalaya that instructed me to let the shrimp cook in there for 25 minutes), and then sort through just as many comments in order to find out how to actually prepare the recipe. I’m just not so in to that.

Of course, my favorite brownie recipe came from Tasty Kitchen, so I don’t always follow my own advice on that one.

…what about you?…

What are your go-to places for recipes (or food ideas) and why?

2 Comments

Pumpkin Bread

October 5, 2012

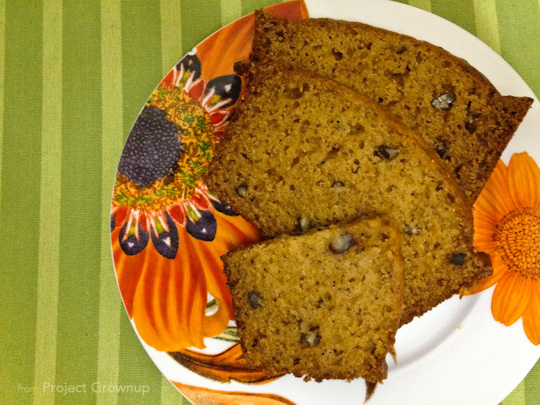
Pumpkin BreadIt’s Foodist Friday. And while I will definitely keep recipes to a minimum around here (in favor of sharing about techniques and ingredients), today I’m honoring the season by sharing one of my favorite Fall recipes with you.

I’ve been using this recipe for nearly ten years. I’ve made this recipe as bread, muffins, and miniature muffins. It tastes great, and even when things don’t go as I’d like, it still turns out. Like yesterday when I fudged the technique and ended up with lumpy batter. And then my oven temperature went cuckoo. My bread came out with crunchy edges, but it turns out my friend prefers those pieces. And no one but me knew about that business with the batter.  Sweet.

Because of its continual kindness toward my belly and me, I recently tried to find the recipe somewhere online so I could share it on a Pinterest board (I only share recipes I’ve used and love). I couldn’t find this recipe anywhere. I found similar ones, even ones by the same creator (why does Paula make five different pumpkin breads??), but not this one.

As it deserves an online presence, I’m gifting you this easy and delicious pumpkin bread. This recipe makes enough to enjoy some now and freeze some for later.

Enough talky talky. Let’s eat.

Pumpkin Bread

Paula Deen, from Lady & Sons Savannah Country Cookbook

Makes 2 loaves. Or oodles of mini-muffins.

3 cups sugar
1 cup vegetable oil
4 eggs
2 cups canned pumpkin
â…” cup water
3 ½ cups all purpose flour
2 tsp. baking soda
1 ½ tsp. salt
1 tsp. ground cinnamon
1 tsp. ground nutmeg
½-¾ cup pecans, chopped (or walnuts)

  1. Preheat oven to 350°. Grease and flour two loaf pans (or whatever pans you’re using).
  2. Combine flour, baking soda, salt, cinnamon, nutmeg, and pecans; whisk together and set aside.
  3. Mix sugar and oil with mixer. Add eggs and blend. Add pumpkin and blend. Add water and blend. C
  4. Add dry mixture to wet mixture a little bit at a time until combined. I add about a fourth of the dry mixture at a time. Fold gently until it just comes together. (Don’t overmix.)
  5. Fill pans equally and bake for until golden brown and set in the middle (about an hour).

8 Comments

How To Store Fresh Herbs and Greens (for Quality and a Lengthy Lifespan)

September 28, 2012

People swear by myriad methods for keeping greens lively and fresh. I’m sure each has its merit, but this one has never let me down. So give it a try if you don’t already have a tried and true technique.

But first, a note: prep the greens ASAP after purchase, ideally the same day. There is usually residual water on the greens that seems to speed up their deterioration.

How To Store Herbs and Greens for Maximum Freshness

  1. Wash the GreensSeparate the leaves and rinse as well as possible. I use a salad spinner and often let the bowl and strainer fill with water as I’m rinsing the leaves. Then I give the leaves a little swish in the water before lifting the colander out of the water and letting them drain.
  2. Dry ThemI swear by the salad spinner for this. I give the leaves a spin and dump the water, and then do it again. Then I move the leaves around a little with my hand and do it a few more times. They are still a little damp afterward but have no beads of water remaining. It’s perfect. And fast.If you don’t have a salad spinner, get the greens as dry as possible any way you can. My first alternate choice is to shake the leaves over the sink, lay them out on a tea towel, then roll up the tea towel and give it a gentle squeeze.
  3. Store in Airtight Container with Something to Absorb the Moisture.I usually line the container with a paper towel, put a paper towel or two in between layers and then lay one on top. I don’t have fresh greens around all that often (I live in the desert, after all) and I don’t use paper towels for hardly anything else, so it doesn’t bother me. If you’d rather use something more environmentally friendly, maybe use a tea towel instead. (I’d love to hear what alternatives you come up with!)
  4. RefrigerateKeep greens refrigerated at all times so that they maintain their crispness. I have no scientific explanation for you here, but in my experience, herbs and greens left out at room temperature for even 30 minutes can go irreversibly wilty. Then again, my room temperature is likely a good bit hotter than yours. Lucky you.

One Final Note

This method works for a small bunch of herbs or a large head of lettuce; just choose an appropriately-sized container and you’re all set. And, as an added bonus, everything is already cleaned and waiting for you when you need it. Overall a pretty big win, I’d say.

…and you?…

What do you do with fresh herbs and greens? Think you’ll give this a try?

Leave a Comment

  • « Previous Page
  • 1
  • 2
  • 3
  • Next Page »
Hi! I'm amber. And these are conversations on life, humanity, and other curiosities borne of my wandering mind and everyday life.
  • Email
  • Instagram
  • Pinterest
  • RSS
  • Twitter

Search:

© 2025 · Blog Design by Bloom.