amber black

  • home
  • topics
    • life & living
    • food & drink
    • community & humanity
    • hacks & productivity
    • books & learning
    • places & travel
    • bits from our life
  • about
  • contact

Oatmeal Chocolate Chip Pecan Cookies (and other cookie tips)

December 17, 2013

Prepare to meet your new best friend. He’ll be there for you on sad days, accompany you to the park when you wish, and even join you for a coffee date at a moment’s notice.

If you’re not an oatmeal cookie fan, don’t let that dissuade you. The quick-cooking oats in this recipe just thicken things up a bit; the cookies aren’t really oatmeally, I promise.

If you’ve checked out my DIY Granola or From-Scratch Oatmeal posts, you know I’m a fan of learning the gist of how food works rather than having to always rely on recipe. Changing my cooking practice to learning from recipe-ing has resulted in much better food around here and has made cooking SO much more fun.

Which means that when I post a recipe on this blog, I aim to make it undeniably worth your time.

These cookies? Worth. your. time. Hashtag I’m-the-real-cookie-monster. Hashtag nom-nom-nom-nom-nom. (You’ve seen this, right?)

When I first made these cookies for our Christmas Creatures photograph, I had to leave out the citrus zest called for in the recipe (shout out to Smitten Kitchen) because I didn’t have any oranges on hand. After making them once, however, I decided to cut out the Autumn-spices-and-orange bit altogether and make a few other adjustments, too.

First I’ll serve up my version of the recipe and then [Read more…]

2 Comments

On Digital Cookbooks & Two On-Sale Titles

June 27, 2013

Since parting with most of our belongings and moving overseas several years ago, the Dude and I have been aiming to live “lighter.” This is tricky, as places can feel lonely and un-home-like when they’re too sparse (well, to me, anyway). But transitioning a portion of our reference library to digital format has been an easy way to lighten the load.

We still keep plenty of true books around for their beauty (both visual and in reading), but I’m finding more and more that digital-versions of kitchen reference books are one of the easiest ways to abandon a LOT of weight without sacrificing much aesthetically. And with food tomes often setting my purse back $20-$50, the comparative cost of the digital version is certainly attractive.

I wouldn’t recommend planning to use digital food references or cookbooks on the traditional Kindle, but they work great on the (free) Kindle desktop app and on iPad, too.

Take the two barbecue helps How to Grill… and Barbecue! Bible, Sauces, Rubs, and Marinades…, for example. The both have rave reviews (in fact, I once gave one as a gift to a friend, and she thanked me repeatedly for it), but together would cost $27 and weigh sev-er-al pounds in their paperback forms. But they are currently just $2.99 each for Kindle. I’m always up for understanding the nitty gritty of cooking techniques and have purchased both. Hopefully I’ll have opportunity to fire up the grill while we’re home this summer!

What are your thoughts on digital food books? Have you tried them? Would you?

Leave a Comment

Easy Homemade Granola (Without a Recipe)

March 5, 2013

Easy Homemade Granola. Use your pantry to make healthier granola. (Best Part? You don't need a recipe.) Pin for future reference!

Have you ever made granola from scratch? Did you have to buy new ingredients or stay glued to the recipe to do it? Happily, there’s another way. And it’s easy!

Here’s How to make granola. Right now. With what’s in your pantry.

Learning the technique this way (instead of following a recipe) will let you:

  • Have granola instantly when you want it.
  • Without going to the store (assuming you have a few everyday things on hand).
  • Use up ingredients you already have, particularly those tablespoon size remnants of random nuts and seeds.
  • Customize the perfect tasting granola for your family, while only including ingredients you can, and like, to eat (allergies, anyone?).
  • Spend less money, and usually, create less waste.
  • Feel super awesome that you can do this in your sleep. 

But first a little story…

I first started making my own granola because I thought it’d be cheaper and healthier than store-bought. It also seemed like I’d be able to make it from stuff I already had on hand, because I always have oats and some kind of nuts or seeds lying about.

But as with most try-it-from-scratch endeavors, as I began looking around for recipes, I got stuck. There were five more things I’d have to buy in order to make the recipe, and the long lists of ingredients seemed silly.

And let’s be serious. I wasn’t looking for the best granola EV-ER, I just wanted something healthier and cheaper than store bought.

Did it really have to be so complicated?

But I’ve discovered that when your goal is feeding people healthy tasteful things (rather than preparing to entertain royalty), most at-home cooking can be boiled down (heh heh) to a ratio and a technique.

If you get in the habit of testing and tasting and thinking, you can make healthy food, from what’s in your pantry, and give your creative self a playground as you do it. Dare I say, it can be fun.

Today I’m going to give you this kind of starting point for granola. Try this with what you have on hand, and think about what it looks and feels and tastes like as you do it. What does 4 cups of oats look like in the bowl? What does the ratio of ingredients look like? How much clumping happens when you add the oil/syrup mixture? Especially note your observations of saltiness before and after baking.

Let’s get started, shall we?

Homemade Granola
with What’s in Your Pantry

[Read more…]

77 Comments

The Cheater Latte (in 3 minutes)

January 24, 2013

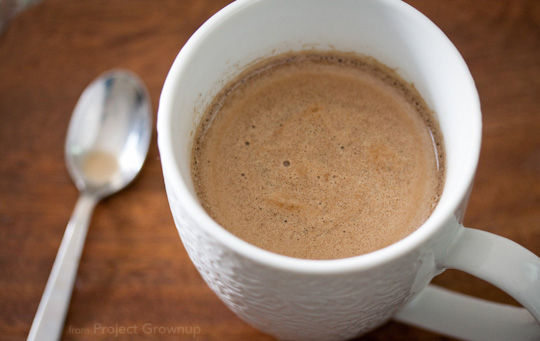
Is there anything afternoon coffee can’t cure? I doubt it. And this beaut is ready in 3 and 3.
(Three ingredients and three minutes. I mean, how often do you get the opportunity to reference defunct dating shows?)

the Cheater Latte

Back to business. The Cheater Latte is exactly what it sounds like. It tastes like a latte (and with minimal experimentation begins to taste like a really good latte), but takes a fifth of the effort. What’s not to love?

Here’s the quick 3-step process for making your own. I’m giving you the technique, just keep tasting and adjusting until you find the perfect “recipe” for your taste. I never measure mine. Ever. So I would have no idea what measurements to give you, anyway.

Try it out this week and let me know what you think!

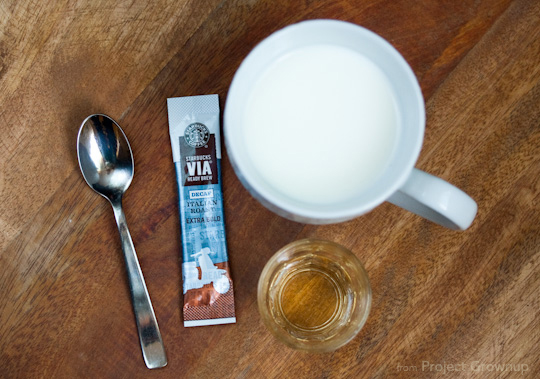
Cheater Latte Ingredients.

How to Make a Cheater Latte

  1. Heat a cup of milk in the microwave. I often heat mine in a glass measuring cup and then pour it into the mug. Sure it’s an extra step, but it solves the oops-I-let-the-milk-heat-too-long-and-now-it-has-a-film-on-top problem. (You can also do this on the stove, but not in 3 minutes.)
  2. Add instant coffee or espresso. More for a bigger jolt and richer taste, less for the opposite. You’ll see I use VIA Decaf so I get the taste without the jolt.
  3. Stir in some flavored syrup. I make my own vanilla syrup by dissolving 1.5 cups of sugar into a cup of water in a small saucepan over low heat, and then adding about a teaspoon of vanilla after removing the pan from the flame. I make other flavors, too, but that’s for another day.

And that’s it. Drink ‘er up and think of me. I’ll be drinking mine and thinking of some place cold enough to warrant a warm drink every afternoon.

My lovely M-I-L is coming to visit next week, so it remains to be seen whether regular posting will return next week or the week after. In preparing for her arrival, I’ve realized that though I love experimenting in the kitchen, I lack a repertoire of quick, crowd-pleasing yums to prepare after a day of adventure. I’ve cried for help on the Facebook Page;  I’d love to hear your go-to guest foods if you can spare a sec! (And thanks in advance ;-))

6 Comments

Homemade Eggnog

November 16, 2012

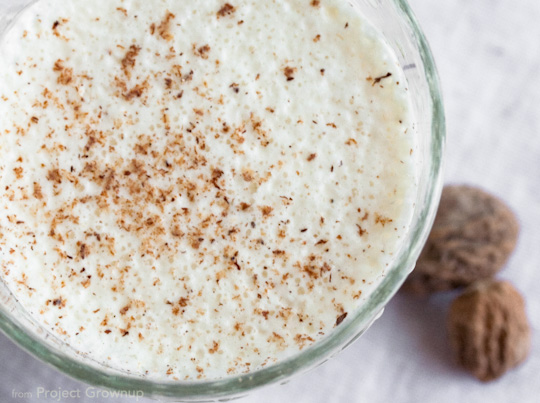
DIY EggnogI used to hate eggnog. Like hate it. Every year someone would have a carton of it (usually my MIL, hi, Debbie!) and every year I’d try it and not understand why they were still making the stuff.
One year my curiosity got the better of me and I had to know: Was real eggnog possibly as awful as the stuff in the carton? I mean, surely it made it to mass-production because at some point some people thought it was pretty tasty, right?

And oh-sweet-father-Christmas, there is definitely a reason people used to like it.  A drink of frothy custardy-ness with the zing of spirits that haven’t been burned off. I mean, wow.

I’ve never had another sip of the cartoned stuff. And I’ve never stopped gushing over the homemade kind. Foodist Fridays aren’t really for recipes, but since I haven’t ventured far from this method myself, and since you do need to know about homemade eggnog, I’m sharing a recipe today. A recipe that will make you a lot of friends.

It’s taken verbatim from Fine Cooking, which I cannot recommend highly enough for excellent from-scratch recipes.

Triple-Shot Eggnog

makes 6-8 servings

Heads up: the main mixture will need to mellow and chill in the fridge for about 4 hours before finalizing and serving. So mix up the first part earlier in the day (it takes about 10 minutes) and then finish it (takes about 10 minutes) in the evening when you’re ready to serve it. Not that I’ll judge you for serving it any time of day.

3 large eggs, preferably pasteurized, separated
1⁄2 cup granulated sugar, 100g
Kosher salt
1⁄2 cup dark rum, 4 oz/120ml
1⁄4 cup bourbon, 2 oz/60ml
2 Tbs. brandy, 1 oz/30ml
2 cups whole milk, 16oz/473ml
1 cup heavy cream, 8oz/237ml
1⁄2 tsp. freshly grated nutmeg, plus extra for garnish
1⁄2 tsp. pure vanilla extract

Directions:

  1. Whisk the egg yolks in a large bowl until they just begin to turn a lighter shade of yellow.
  2. Add the sugar and a pinch of salt and whisk until thick and pale yellow.
  3. Whisk in the rum, bourbon, and brandy until well combined and then whisk in the milk, cream, nutmeg, and vanilla until blended.
  4. Chill the mixture, covered, for 4 hours or overnight. Keep the egg whites chilled separately in a medium bowl.
  5. Before serving, whip the egg whites to stiff peaks with a hand-held electric mixer.
  6. Fold the whipped egg whites into the chilled yolk mixture.
  7. Serve immediately, sprinkled with a little freshly grated nutmeg, or chill for
    up to 4 hours. (Whisk the eggnog until smooth before serving.)

As with all recipes, you should taste and tweak this to your liking. We add just a tad more of almost everything except eggs, milk, and salt, just to bolster the oomph a little. If you enjoy subtle mellowness – which I commend you for – you’ll  want to leave it as is.

So the question is, will you try it?

3 Comments

DIY Hot Chocolate

November 9, 2012

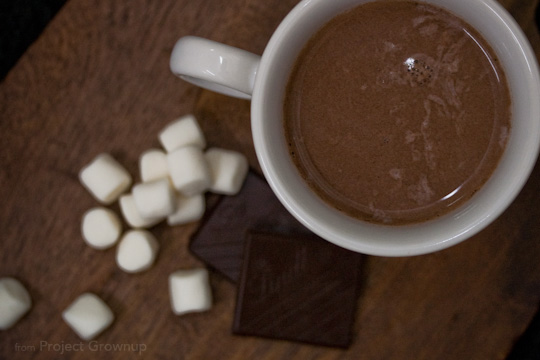
Last week I told you how I love warm drinks and might include some of my faves in November’s Foodist Fridays. Well here I am with our first warm drink: Hot Chocolate!

As with oatmeal and popcorn, I was shocked to discover that instant hot chocolate references something that once existed without a microwave. And as with those two, home-made hot chocolate is far superior to the powdered variety. Plus, it’s easy. And endlessly tweak-able.

For the most basic home-made hot chocolate, you’ll need milk, and either solid chocolate or cocoa powder & sugar. You can boost the flavor a variety of ways from there, but if you’ve got those on hand, you’re set.

(If you’re not making hot chocolate now, pin or bookmark this page to have ready when the mood strikes.)

DIY Hot Chocolate #1: from Powdered Cocoa

Making your own hot chocolate [Read more…]

7 Comments

  • 1
  • 2
  • 3
  • Next Page »
Hi! I'm amber. And these are conversations on life, humanity, and other curiosities borne of my wandering mind and everyday life.
  • Email
  • Instagram
  • Pinterest
  • RSS
  • Twitter

Search:

© 2025 · Blog Design by Bloom.